“How did you get into your present comfort zone?” he asked.
Do you know, I hadn’t really thought about it. I suppose I just slipped into it.
I’ve been working with a new mentor the past week or so, felt like taking on a bit of a challenge, and it hasn’t all been tough. Some has been fun, as well as highly revealing and instructive.
He’s given me plenty to think about. Mostly around not just taking new pictures but how I go about making them sing and dance.
Now it’s true, I’ve been post processing photographs since the days of “Barneyscan”. (you gotta look that up) precursor to Photoshop.
Used to manage our library on something called “Shoebox”, an Eastman Kodak company early attempt at databasing photos. It used a cd jukebox to store photos, and had a clever algorithm to find the tagged ones. Great for demos, type in Bird, or Macaw and up would pop a wonderful rich colour photo of a Macaw. Stunning.
You could also poll it for say, Maureen’s Wedding, or Grey Mustang at Summer Nats, or whatever you’d stored and logged, and up would pop a few seconds later….. a photo of a Macaw… It wasn’t even beta software, more your pre-alpha 🙂
Time moved on, and so did we. I used to use Nikon’s Capture NX2 for a long time. Reason, it was using the clever NIk Technology “U-Point” system and made post processing a breeze, one you got used to its quirkiness. But in the end, I’ve always said, give Photoshop, Layers, Layer Masks and a Paintbrush and that would do me for pp.
So he asked, “How did you get into your present comfort zone?” And we concluded, quite easily, it just felt comfortable.
Which is why the next challenge was to find an image I didn’t have much investment in, and play around with it, in something like Lightroom or Capture One.
And I found there was a lot of the Develop module, that I understood, but didn’t appreciate in terms of setting the mood or emotion or feel, or even my vision of the image.
Particularly in Black and White. I rely on Nik ‘Silver Efex Pro” for my mono conversions. Because there are lots of film effects and the old mono filters that I grew up with. (Another question I’ve added to my memory list from last week: What is the filter factor for a Wratten Green #58?) SFX has them all listed each on it’s own slider, and makes changing sky or tree, or sand to the right tonal level for the feel I’m after, a snap.
This time through I was able to use the local Hue-Saturation-Luminosity filters to achieve the same thing.
Hey, I knew that. But, my comfort zone didn’t 🙂
My Flickr folk were the first to see the difference. I posted a mono pic of a Collared Sparrowhawk on a fence. As a colour shot it was pretty much unattractive. brown bird against sky, ugly fence.
“Try some tone changes,” was the suggestion.
Suddenly it was working, lighter sky, rich tones on the bird feathers and those glowing legs and eyes. Simples. (Hah! I knew that)
Still got a way to go, as I’m tackling a series of challenges around the ‘Visual Roadmap’, not a term I leaned at Art School. More I suspect will follow.
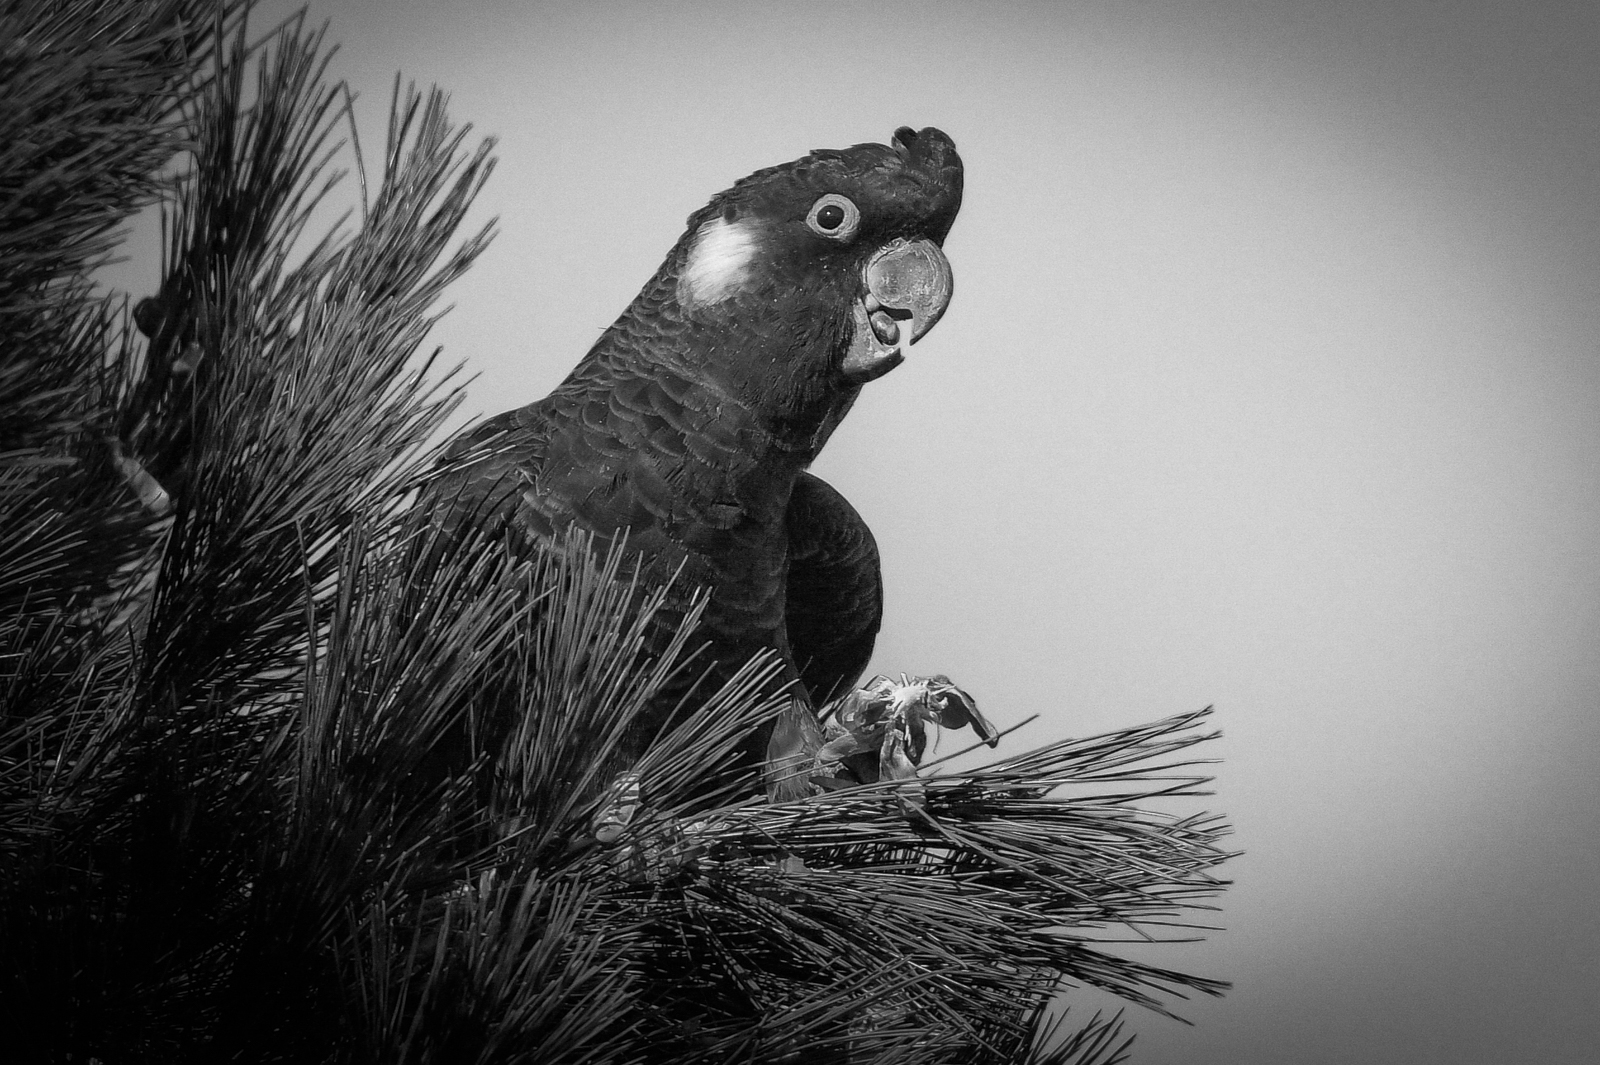
Tonight, as Lee Lin Chin says in the ad, we could play for Ray Martin’s Gold Logi, but instead I’ve settled on a shot from the other day with Mr An Onymous.
It’s a few seconds work in Lightroom’s Black and White mode. A trip through the HSL sliders and a few points of grain.
I wanted to keep the feather detail, but at the same time bring the emphasis on the seeming enjoyment that bird was having with its treat.
Ahh, back to the comfort of a real darkroom 🙂